Saturday, November 26, 2011

Carrot Cake Balls


Carrot Cake

2 C flour                   
2 tsp Baking powder
1 ½ tsp Baking Soda 
1 tsp salt 
2 ½ tsp ground cinnamon
2 C white sugar
1 ½ C vege.Oil 
4 eggs       
2 ¾ C shredded carrots
x1 8oz can crushed pineapple drained
¾ C chopped walnuts
1 C flaked coconut

Directions 
Preheat oven to 325 deg. F. Grease and flour 9x 13 pan.
Mix flour, baking powder, baking soda, salt and cinnamon. Set aside.
 In a large bowl, mix together sugar oil and eggs. Then beat in flour mix. Stir in carrots, pineapple, nuts and coconut. Pour into pan.Bake in preheated oven for 35-40 minutes, or ‘til a toothpick inserted into the middle of the cake comes out clean.Cool and frost with cream cheese frosting. This cake is soooo moist and delicious, it may never make it to the "cake balls" recipe.


 Carrot Cake Balls

-Cream Cheese frosting
-Almond Bark / Candy Coating

Using the above already cooled baked cake, mix in the cream cheese frosting to the crumbed cake. You can use a hand mixer to mix it all together. Cover and place in fridge over night or for at least 3 hours. I used a rounded tablespoon measure that was perfectly ball shaped to roll balls into bite size pieces and placed on a wax paper lined cookie sheet.

Place them in the freezer for at least an hour. Then using a tooth pick, pick up the balls and dip in the melted almond bark, then slide the cake ball off the tooth pick, using a second tooth pick. If the balls start to thaw then put them back in the freezer and return later to finish the job. The more frozen they are, the easier they are to work with. Decorate using sprinkles or drizzle different flavor or color chocolates on top, or plain is still delicious.You can use a hand mixer to mix it all together. Cover and place in fridge over night or for at least 3 hours.

Linked to:
Sumo's Sweet Stuff


Making Keeping It Simple -  Buff
Christmas Paper Piecing Art

This was such a quick and easy project, my favorite kind! :)  Plus I used a frame I already had and scrap papers so it didn't cost me a thing.

First, gather up your supplies:
  • frame (this one is a 5x7)
  • scrap papers
  • embellishments
  • cuttlebug (optional)
Cut everything out (I just did it all freehand) and ink the edges and emboss if you want.


Then just glue it all together and stick it in the frame.  I used foam tape to give everything a bit of dimension.

I was so happy with how it turned out I made another one in a bigger size.  :)


Linked to:


One Artsy MamaThe Shabby NestHookingupwithHoH


Friday, November 25, 2011

Mini Trees


We got these little 3 foot trees for really cheap after Christmas on clearance a couple years ago.  They are perfect for the kids' rooms and one of their favorite parts about decorating for Christmas.  They get to decorate their own trees however they want and as an added bonus the lights act as a night light which the kids love. Just a fun little way to make the kids feel special and get them ready for the holidays.  :)

Thursday, November 24, 2011

Nutella & Banana Crepes

I used to think that crepes were one of those delicacies you could only get at fancy French restaurants and if you wanted to make them at home you'd have to have some special equipment for it.  Not true!  Once I tried them I realized how seriously easy they are and these now make a regular appearance in our home.  My kids ask me all the time to make these -- breakfast, lunch and dinner! :)

First, gather up your ingredients -- sugar, flour, canola oil, milk, eggs, and filling.  Just blend the crepe ingredients in your blender and you are good to go.

Get your skillet on medium heat and spray w/non stick cooking spray.  When the pan is hot pour the batter in.

Give it a good swirl so there is a nice thin layer of batter all over the bottom of the pan.

When the edges start to get a little golden, run a rubber spatula around it to loosen it up and then flip the crepe over.  (I like to pretend I'm on one of those TV cooking shows and flip the crepe by flicking the pan and sending the crepe up and flipping and catching it in the pan.  But just using your fingertips works as well. :) )

Let it cook for another 20 seconds or so and then you're good to go.  I like to keep a stack under a paper towel to keep them warm until they are all made.

Next comes the fun part.  Fill them with what ever you want.  I recently discovered Nutella and pretty much always have a Nutella & banana crepe.  Other good fillings are strawberries, honey butter, ham & cheese, mushroom & cheese, peanut butter & honey, etc.  Really, the possibilities are endless!

So go whip up some crepes for your family and make them think you have taken a fancy French cooking class!


Recipe by Our Best Bites

2 eggs
2 Tbs canola oil
3 Tbs sugar (omit if making savory crepes)
1 C flour
1 1/3 C milk

Combine all ingredients in a blender and blend on low speed until combined, or whisk by hand until there are no lumps.

Heat a non-stick skillet to medium-high heat.  Hold pan with one hand while you pour the batter with the other hand.  Twirl the pan in a circular motion pouring just enough batter to coat the bottom of the pan.   Place on cooking surface and cook until edges are set and you can easily run a rubber spatula around the edge of the pan, 30 seconds.   Flip crepe and cook an additional 15-20 seconds.  Remove crepe from pan and either keep warm in the oven or cool to room temperature.

Fill with your choice of savory (meat, cheese, vegetable) or sweet (pudding, mousse, pastry cream, fruit) filling.  Top sweet crepes with  with a dusting of powdered sugar or  whipped cream.

Unfilled crepes can be stacked between sheets of waxed paper and refrigerated or frozen.  To thaw, leave at room temperature.  


Makes 12-14 8″ crepes

Tuesday, November 22, 2011

What I Wore Wednesday


Poncho- TJ-Maxx
Shirt- TJ-Maxx
Jeans- Nordstrom Rack
Boots- Discount Shoe Factory

Linked to:

pleated poppy Momma Go Round

</

Monday, November 21, 2011

Pumpkin Turkey


I saw this idea at my dentist's office of all place and decided to make my own version. The feathers are from the wild turkey hunt. I used foam that I had around the house for the face and red craft foam sheets for the little red part. I used beads for the eyes and brown craft foam sheets for the feet.

-Buff

Linked to:

Making Keeping It Simple

Menu Plan Monday 11/21

I've been in a kind of dinner rut lately. Nothing really sounds good and usually by the end of the day I'm worn out and don't feel like cooking anyway. And on the occasions I actually do prepare a meal, my picky little eaters won't even touch it so I'm trying to get them to at least try it and of course they won't so it's this big battle and I end up making them something different anyway and by that time my food has gotten cold and it's just all very discouraging. Sigh.

In fact, last night I actually made dessert for dinner -- brownies, cookies, ice cream. Yeah, the kids totally ate it.


But since dessert for dinner isn't really a good option 99% of the time, I figured I need to get back on track with meal planning. I find that if I plan my meals for a week and get everything at the store (that's usually the hard part -- shopping with the kids!) then my dinners seem to go more smoothly. So here's my meal plan for this week.

Monday
Guiltless Alfredo over penne pasta w/grilled chicken
garlic bread
green salad


Tuesday
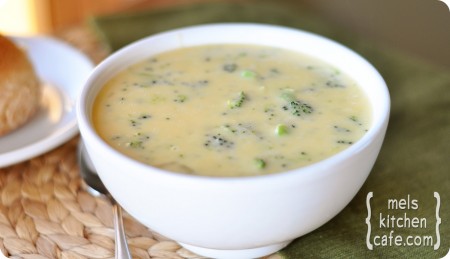
Broccoli cheese soup
rolls
  

Wednesday
Chicken Chimichangas
rice
Thursday
Thanksgiving dinner at family's

Friday
Ranch Chicken pizza


Saturday
Parmesan fondue
chocolate fondue

Sunday
leftovers


Linked to:

Organizing Junkie

Sunday, November 20, 2011

Ikea Curtains: Upcycled


I'm currently working on decorating my guest bedroom. I decided to go with a yellow & gray color combo and I LOVE the way it is turning out! I painted the walls gray but when it came to window treatments I had a bit of a dilemma.  I knew yellow curtains would be too much so I thought white would look good.  But when I put them on the walls it just looked too blah.  Enter my awesome mother.  We picked up some cheap white curtains from Ikea (love the ones with grommets!) and some yellow & gray fabric from Joanns. 

(Since I have a phobia of sewing machines my mom did all the work on these!)  She cut the curtains, inserted a panel of fabric, and sewed it all together.


Don't they look fabulous?!  I am so happy with how they turned out.  It gives just the right pop of color in the room without being overbearing.  Stay tuned later this week when I show you the finished room.  I have a few finishing touches to do and then it will be all ready for our guests to arrive in a couple weeks! :)


Linked up:
Making Keeping It Simple

LinkWithin

Related Posts Plugin for WordPress, Blogger...